테마 토글 기능 설정하기 (with shadcn/ui)
들어가며
- Next.js를 이용하여 테마 토글 기능을 설정하는 방법을 정리해본다.
- 이 게시글의 내용은 타입스크립트(TypeScript)와 shadcn UI 컴포넌트 라이브러리를 바탕으로 작성되었다.

방법
① 색상 템플릿 코드를 전역 스타일시트 파일(@globals.css@)에 넣기
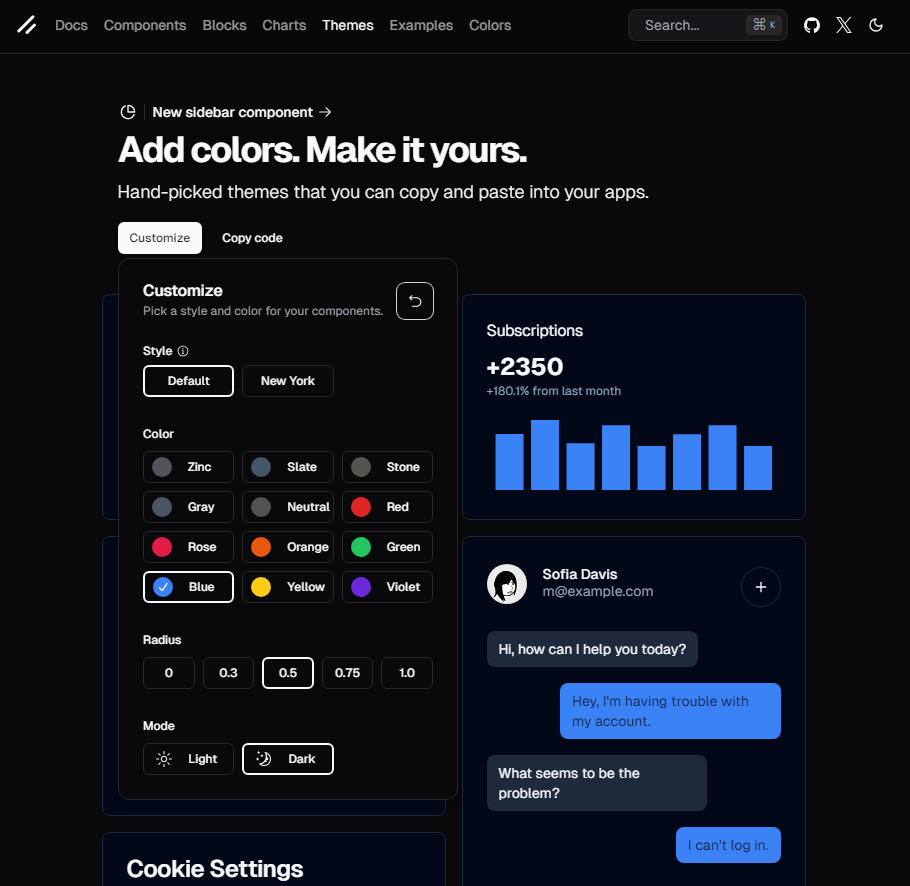
- 아래의 사이트에서 자신에게 맞는 라이트/다크 모드 색상 템플릿을 선택한 후, 색상 코드를 복사한다.
shadcn/ui
Beautifully designed components that you can copy and paste into your apps. Accessible. Customizable. Open Source.
ui.shadcn.com
 |
 |
- 그리고 전역 스타일시트 파일(@/app/globals.css@)에 넣어준다.
/app/globals.css
@tailwind base;
@tailwind components;
@tailwind utilities;

/* ... */

@layer base {
  :root {
    --background: 0 0% 100%;
    --foreground: 222.2 84% 4.9%;
    --card: 0 0% 100%;
    --card-foreground: 222.2 84% 4.9%;
    --popover: 0 0% 100%;
    --popover-foreground: 222.2 84% 4.9%;
    --primary: 221.2 83.2% 53.3%;
    --primary-foreground: 210 40% 98%;
    --secondary: 210 40% 96.1%;
    --secondary-foreground: 222.2 47.4% 11.2%;
    --muted: 210 40% 96.1%;
    --muted-foreground: 215.4 16.3% 46.9%;
    --accent: 210 40% 96.1%;
    --accent-foreground: 222.2 47.4% 11.2%;
    --destructive: 0 84.2% 60.2%;
    --destructive-foreground: 210 40% 98%;
    --border: 214.3 31.8% 91.4%;
    --input: 214.3 31.8% 91.4%;
    --ring: 221.2 83.2% 53.3%;
    --radius: 0.5rem;
    --chart-1: 12 76% 61%;
    --chart-2: 173 58% 39%;
    --chart-3: 197 37% 24%;
    --chart-4: 43 74% 66%;
    --chart-5: 27 87% 67%;
  }

  .dark {
    --background: 222.2 84% 4.9%;
    --foreground: 210 40% 98%;
    --card: 222.2 84% 4.9%;
    --card-foreground: 210 40% 98%;
    --popover: 222.2 84% 4.9%;
    --popover-foreground: 210 40% 98%;
    --primary: 217.2 91.2% 59.8%;
    --primary-foreground: 222.2 47.4% 11.2%;
    --secondary: 217.2 32.6% 17.5%;
    --secondary-foreground: 210 40% 98%;
    --muted: 217.2 32.6% 17.5%;
    --muted-foreground: 215 20.2% 65.1%;
    --accent: 217.2 32.6% 17.5%;
    --accent-foreground: 210 40% 98%;
    --destructive: 0 62.8% 30.6%;
    --destructive-foreground: 210 40% 98%;
    --border: 217.2 32.6% 17.5%;
    --input: 217.2 32.6% 17.5%;
    --ring: 224.3 76.3% 48%;
    --chart-1: 220 70% 50%;
    --chart-2: 160 60% 45%;
    --chart-3: 30 80% 55%;
    --chart-4: 280 65% 60%;
    --chart-5: 340 75% 55%;
  }
}

/* ... */
② @next-themes@ 패키지 설치하기
- 터미널에 아래의 명령을 실행하여 @next-themes@ 패키지를 설치한다.
$ npm install next-themes # yarn add next-themes
@next-themes@ 패키지는 Next.js 애플리케이션에서 다크 모드와 같은 테마를 손쉽게 설정하고 관리할 수 있도록 도와준다. 다크 모드 또는 시스템 테마와 같은 기능을 쉽게 구현할 수 있게 해준다.
③ 테마 프로바이더 파일 생성하기
- 테마를 관리해주는 프로바이더 파일(@theme-provider@)을 생성해준다.
- 그리고 아래와 같이 코드를 작성해준다.
/providers/theme-provider.tsx
'use client';

import * as React from 'react';
import { ThemeProvider as NextThemesProvider } from 'next-themes';
import { type ThemeProviderProps } from 'next-themes/dist/types';

export const ThemeProvider({ children, ...props }: ThemeProviderProps) {
  return <NextThemesProvider {...props}>{children}</NextThemesProvider>;
}
④ 전역 프로바이더 파일에 추가하기
- 전역적으로 관리하는 프로바이더 파일(@providers@)에 ④에서 생성한 테마 프로바이더(@theme-provider@)를 추가해준다.
/app/providers.tsx
'use client';
import { ThemeProvider } from '@/providers/theme-provider';

const Providers = ({ children }: { children: React.ReactNode }) => {
  return (
    <>
      <ThemeProvider
        attribute='class'
        defaultTheme='system'
        enableSystem
        disableTransitionOnChange
      >
        {children}
      </ThemeProvider>
    </>
  );
};

export default Providers;
⇒ @attribute='class'@는 @ThemeProvider@가 테마 속성을 HTML의 @class@ 속성으로 적용하도록 설정한다.
⇒ @defaultTheme='system'@는 기본 테마를 사용자의 시스템 테마에 맞추도록 지정한다.
⇒ @enableSystem@은 시스템 테마를 활성화하여 자동으로 사용자 시스템 테마에 맞춘다.
⇒ @disableTransitionOnChange@는 테마 변경 시 전환 효과를 비활성화하여 빠르게 전환될 수 있도록 한다.
- 위에서 작성한 전역 프로바이더는 아래와 같이 전역 레이아웃 파일(@./app/layout.tsx@)에서 전체 본문의 내용을 감싸는 데 사용된다.
/app/layout.tsx
import type { Metadata } from 'next';

import './globals.css';

import Providers from './providers';

export default function RootLayout({
  children,
}: Readonly<{
  children: React.ReactNode;
}>) {
  return (
    <html lang='en' suppressHydrationWarning>
      <body className={inter.className}>
        <Providers>{children}</Providers>
      </body>
    </html>
  );
}
⑤ 테마 토글 컴포넌트 생성하기
- 이제 테마를 토글해주는 컴포넌트(@ThemeToggle@)를 만들고, 아래와 같이 코드를 작성해준다.
- 그리고 테마 토글 컴포넌트를 네비게이션바 등에 부착해준다.
./components/ThmeToggle.tsx
- @next-themes@ 패키지의 @useTheme@ 훅을 이용하여 테마를 변경해 줄 수 있다.
'use client';

import * as React from 'react';
import { Moon, Sun } from 'lucide-react';
import { useTheme } from 'next-themes';

import { Button } from '@/components/ui/button';
import {
  DropdownMenu,
  DropdownMenuContent,
  DropdownMenuItem,
  DropdownMenuTrigger,
} from '@/components/ui/dropdown-menu';

export function ModeToggle() {
  const { setTheme } = useTheme();

  return (
    <DropdownMenu>
      <DropdownMenuTrigger asChild>
        <Button variant='outline' size='icon'>
          <Sun className='h-[1.2rem] w-[1.2rem] rotate-0 scale-100 transition-all dark:-rotate-90 dark:scale-0' />
          <Moon className='absolute h-[1.2rem] w-[1.2rem] rotate-90 scale-0 transition-all dark:rotate-0 dark:scale-100' />
          <span className='sr-only'>Toggle theme</span>
        </Button>
      </DropdownMenuTrigger>
      <DropdownMenuContent align='end'>
        <DropdownMenuItem onClick={() => setTheme('light')}>
          Light
        </DropdownMenuItem>
        <DropdownMenuItem onClick={() => setTheme('dark')}>
          Dark
        </DropdownMenuItem>
        <DropdownMenuItem onClick={() => setTheme('system')}>
          System
        </DropdownMenuItem>
      </DropdownMenuContent>
    </DropdownMenu>
  );
}
⑥ 결과 확인

참고 사이트
Next.js
Adding dark mode to your next app.
ui.shadcn.com
Theming
Using CSS Variables or Tailwind CSS for theming.
ui.shadcn.com
GitHub - pacocoursey/next-themes: Perfect Next.js dark mode in 2 lines of code. Support System preference and any other theme wi
Perfect Next.js dark mode in 2 lines of code. Support System preference and any other theme with no flashing - pacocoursey/next-themes
github.com
'Framework > Next.js' 카테고리의 다른 글
| [Next.js] 같은 네트워크 망에 연결된 다른 컴퓨터에서 테스트 하는 방법 (0) | 2025.06.08 |
|---|---|
| [Next.js] <Link> 컴포넌트 클릭 시, 최상단으로 스크롤 되는 현상 막는 방법 (0) | 2024.12.20 |
| [Next.js] Hydration 에러 해결하는 방법 (Next.js 15) (0) | 2024.11.21 |
| [Next.js] 렌더링 방식 정리 (CSR(Client Side Rendering), SSR(Server Side Rendering), SSG(Static Site Generation), ISR(Incremental Static Regeneration)) (14) | 2024.11.14 |
| [Next.js] 갑자기 "'next'은(는) 내부 또는 외부 명령, 실행할 수 있는 프로그램, 또는배치 파일이 아닙니다." 오류가 발생할 때 해결 방법 (0) | 2024.10.30 |
| [Next.js] 환경 변수 사용 방법 (1) | 2024.10.29 |
| [Next.js] 폴더 구조 및 동적 경로 설정하기 (0) | 2024.10.16 |
| [Next.js] 정적 생성(Static Generation)과 서버사이드 렌더링(Server-side Rendering) (0) | 2024.08.08 |
